
An above-ground pool that tilts by several centimeters is often noticed too late, once filling is complete. The top ring is level on one side and dips on the other, the structure deforms, and the temptation to empty it all to start over is strong. The good news: in most cases, the problem can be corrected without losing thousands of liters of water, provided you intervene methodically and know the limits of the maneuver.
Assess the slope before touching anything
Before lifting or shimming, you need to measure the gap precisely. A bubble level placed on the top ring or a laser level on the ground provides a reliable reading in a few minutes. The difference in water height between the highest and lowest sides indicates the extent of the problem.
Read also : How to Write an Effective Collaboration Email: Tips and Practical Examples
If the gap remains small (a few centimeters), gradual shimming is possible without draining. Beyond that, manufacturers like Intex and Bestway specify in their recent manuals that the pool must be emptied before any ground correction, to avoid wall rupture or liner tearing. Ignoring this limit risks a sudden collapse with several cubic meters of water released all at once into the garden.
You can find detailed methods for straightening an above-ground pool without draining in addition to these precautions, particularly on shimming techniques suitable for small slopes.
Related reading : The best tips for politely canceling an appointment by email
Gradual shimming on the low side: the field method
The principle is simple: slightly lift the sagging side of the pool to slide a shimming material under the base, without moving the entire structure. In practice, it’s more delicate than it seems.
Partially lower the water level
Do not empty it all, but lower the water level enough to reduce the pressure on the side to be corrected. Reducing the volume by a third already significantly lightens the structure and makes manipulation realistic. Using the drain connection or a siphon hose allows you to control the flow.
Choosing the shimming material
Compacted sand remains the best ally for correcting a gentle slope. It is packed in layers under the low area, checking the level with each addition. Puzzle-type foam tiles, often used as floor mats, can complement the shimming for very small differences.
- Medium-grained sand, moistened and then compacted by hand or with a board: it conforms to the base of the liner and stabilizes well once compacted.
- Treated wood or composite shims, placed under the legs of a tubular pool for a precise adjustment of a few centimeters.
- Flat concrete slabs (like patio slabs) slid under the posts of a tubular structure, useful when the ground is soft and the legs sink unevenly.
Feedback varies on the use of extruded polystyrene boards: some find them stable, while others notice they crush under weight after a few weeks. Sand or concrete is preferred for a durable result.
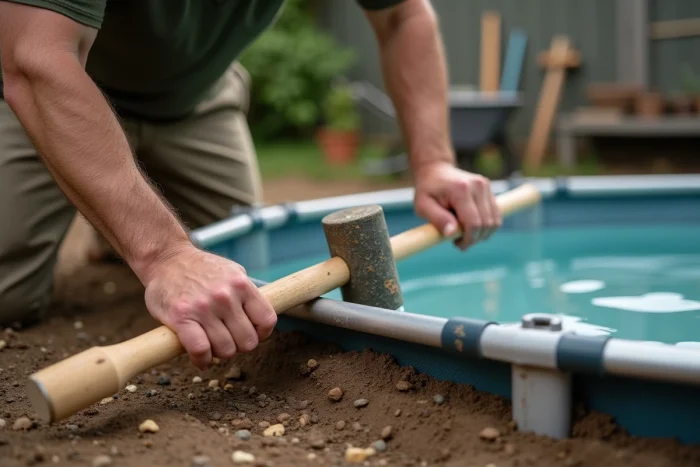
Lift without forcing the structure
At least two people. One person lifts the edge of the pool by the ring (never by pulling on the liner) while the other pushes the sand or positions the shim. Each adjustment is made in small increments, no more than one or two centimeters at a time, rechecking the level between each pass.
On a tubular pool, work foot by foot. Lift one post with a lever (a thick board is sufficient), slide the shim or slab, then move to the next foot. Forcing multiple feet simultaneously deforms the horizontal bars and can twist the connectors.
Correcting a tubular pool by the feet
On tubular models, the correction is more targeted than on ring-supported pools. Each foot rests on a specific point of the ground, and it’s often one or two feet sunk into soft ground that causes the tilt.
Identifying the feet that have sunk allows you to focus the intervention. Measure the height of each foot relative to a fixed reference point (deck, low wall). The lowest foot or feet are the ones to be corrected.
Sliding a concrete slab under each affected foot distributes the load and prevents further sinking. For clay or sandy soils, a slab with sufficient surface area prevents the foot from re-piercing the ground during the next filling. Ensure at least a slab surface that significantly exceeds the base of the foot.
Polyurethane foam injection under slab: a professional solution
When the pool rests on a concrete slab that has locally sunk, artisanal shimming is no longer sufficient. Specialized companies in slab lifting (a technique known as “foam jacking”) intervene by injecting expanded polyurethane foam through micro-drillings in the concrete. The foam expands under the slab and gradually raises it to the desired level.
This technique, initially used for patios and driveways, also applies to slabs supporting above-ground pools. The intervention does not require complete draining, making it particularly suitable for large volume pools. The cost remains higher than simple sand shimming, but the result is uniform and durable.
Common mistakes when straightening an above-ground pool
Some attempts to correct the situation worsen it instead.
- Adding sand only under the liner without lowering the water level: the pressure prevents proper positioning of the material, creating bumps that weaken the bottom.
- Using stacked concrete blocks as shims: unstable, they can tip under load and cause a tear in the liner at their edges.
- Pulling the inflatable ring to “move” the still-full pool: the soft wall is not designed to withstand lateral pulling with the weight of the water, and the risk of tearing is real.
- Ignoring a marked slope thinking the pool “will settle”: the water pressure does not redistribute itself, and the deformation worsens over time.
Straightening an above-ground or tubular pool is achievable in the majority of cases, provided you stay within the slope tolerance accepted by the manufacturer. Beyond that, partial or total draining remains the only reasonable option. It’s better to lose a few cubic meters of water than to find your pool collapsed one morning.